![How to Make Fluffy Pancakes That Rival Any Diner [Guide]](https://lauriesgrill.restaurant/wp-content/uploads/emplibot/pancake-recipes-hero-1773548119-1080x675.jpeg)
Most diner pancakes taste fluffy because they nail the fundamentals-not because of secret ingredients. At Laurie’s Grill, we’ve tested countless pancake recipes to understand what actually makes the difference between dense, rubbery pancakes and ones that are light and airy.
This guide walks you through the science, equipment, and techniques that separate mediocre pancakes from exceptional ones.
The Science Behind Fluffy Pancakes
Baking Soda and Baking Powder Work Differently
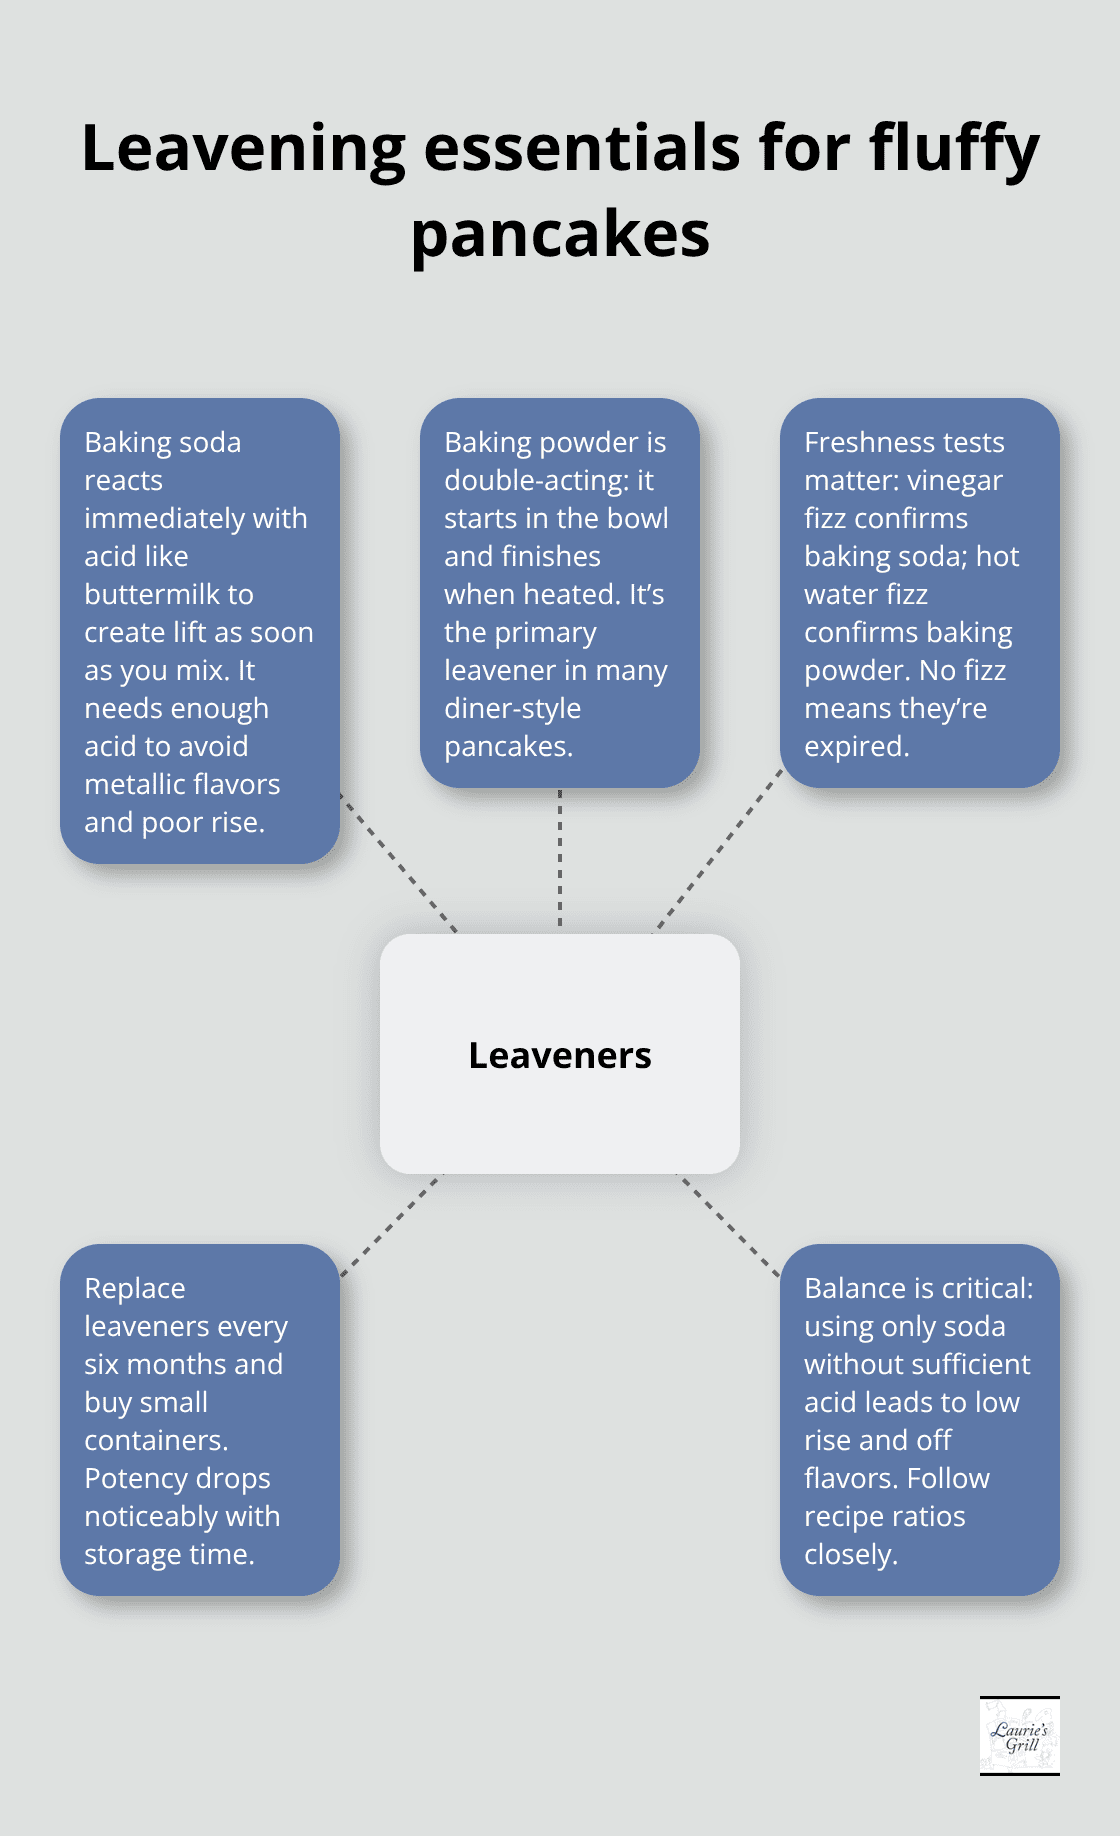
Baking soda and baking powder are not interchangeable, and using the wrong one or the wrong amount will sabotage your pancakes. Baking soda reacts immediately when it meets an acid like buttermilk, creating carbon dioxide bubbles that lift your batter right away. Baking powder, on the other hand, contains baking soda plus acidic compounds and works in two stages: some bubbles form when you mix the batter, and more form when heat hits the pan. This dual-action approach is why most diner pancakes rely on baking powder as the primary leavener. If you use only baking soda without sufficient acid, your pancakes will taste metallic and won’t rise properly.
Test your baking soda with a splash of vinegar-it should fizz immediately-and test your baking powder with hot water. If neither fizzes, they’ve expired and won’t lift your pancakes. Fresh leaveners are non-negotiable. You should buy small containers and replace them every six months, since baking soda loses potency after about six months of storage.
Lumps in Your Batter Signal Success
The moment you combine wet and dry ingredients, gluten strands start developing, and overmixing creates a dense, tough pancake that tastes more like cake than a diner classic. You should mix just until the dry ingredients are barely moistened and small lumps remain visible in the batter. This takes about fifteen to twenty seconds with a spatula or whisk. America’s Test Kitchen emphasizes this point repeatedly because it’s where most home cooks fail. If you’re worried about lumps, stop worrying-lumps are your friend and signal you haven’t overdeveloped the gluten.
The batter should be thick enough that it runs slowly off a spoon, not pourable like crepe batter. Leavening agents work best in a loose batter structure, so you should resist the urge to create a smooth, lump-free mixture.
Temperature Controls Both Rise and Browning
Temperature affects both how your pancakes rise and how evenly they brown. You should set your pan or griddle to 375 degrees Fahrenheit on an electric griddle. Gas stoves vary wildly, so use medium to medium-low and do a test batch first to find your stove’s sweet spot. If your pancakes spread flat or deflate after flipping, your heat is too high. If they brown too slowly or stay pale, your heat is too low.
Once you’ve nailed the temperature for your specific stove and pan, stick with it for consistency. Heavy-bottomed pans and cast iron hold heat more evenly than thin pans, which develop hot spots that cause uneven rising and burning. You should let your pan preheat for at least two minutes after lowering the heat so the surface temperature stabilizes. Flipping too early is another temperature-related mistake: wait until you see eight to ten bubbles on the surface and the bottom is golden brown before you flip. Flipping before the first side is fully set causes the pancake to deflate because the structure hasn’t set enough to support its own weight.
With the science locked in, the next step is gathering the right ingredients and equipment to put these principles into action.
Essential Ingredients and Equipment for Perfect Pancakes
The Ingredients That Matter Most
All-purpose flour, sugar, baking powder, baking soda, kosher salt, buttermilk, eggs, and unsalted butter form the foundation of fluffy pancakes. Buttermilk stands out as non-negotiable because the acid in it reacts with baking soda in quick breads like pancakes and biscuits to help them rise, and it also helps break down gluten. If you lack buttermilk, acidify regular milk with lemon juice to replicate the effect. Use 2 cups all-purpose flour, 3 tablespoons sugar, 1½ teaspoons baking powder, 1½ teaspoons baking soda, 1¼ teaspoons kosher salt, 2½ cups buttermilk, 2 large eggs, and 3 tablespoons unsalted butter melted to yield 4 servings.
Ingredient quality matters enormously because the batter itself is simple. Buy fresh baking soda and baking powder in small containers rather than massive boxes that sit unused in your pantry. Baking soda & powder do have expiration dates and should be replaced regularly. Clarified butter or neutral oil like vegetable or canola oil works better for cooking than whole butter because milk solids burn easily at pancake-cooking temperatures and create bitter, charred flavors.
Selecting the Right Pan and Heat Source
Your pan choice determines whether pancakes rise evenly or develop hot spots that cause uneven browning and deflation. Cast iron or heavy-bottomed nonstick skillets hold heat most evenly and produce crisp edges that rival diner versions. Thin pans develop temperature fluctuations that sabotage your results. A large nonstick skillet or griddle lets you cook multiple pancakes simultaneously without crowding, which prevents steam buildup that deflates adjacent pancakes.
Preheat your chosen pan on medium heat for about two minutes, then lower to medium-low and wait another two minutes before adding oil. This stabilizes surface temperature and prevents the first batch from cooking too fast.

Tools That Streamline the Process
A 1/4 cup measuring cup portions batter consistently so pancakes cook evenly. A flexible plastic spatula works better than metal for flipping because it reduces the risk of tearing or misshaping delicate pancakes. A wire rack and rimmed baking sheet hold finished pancakes at 325 degrees Fahrenheit without drying them out while you cook remaining batches (this setup prevents condensation from making pancakes soggy). These tools transform pancake cooking from guesswork into a repeatable process that yields restaurant-quality results every time.
With your ingredients assembled and equipment ready, you can now move forward with the actual cooking technique that separates fluffy pancakes from dense disappointments.
Step-by-Step Guide to Cooking Fluffy Pancakes
Mixing the Batter Correctly
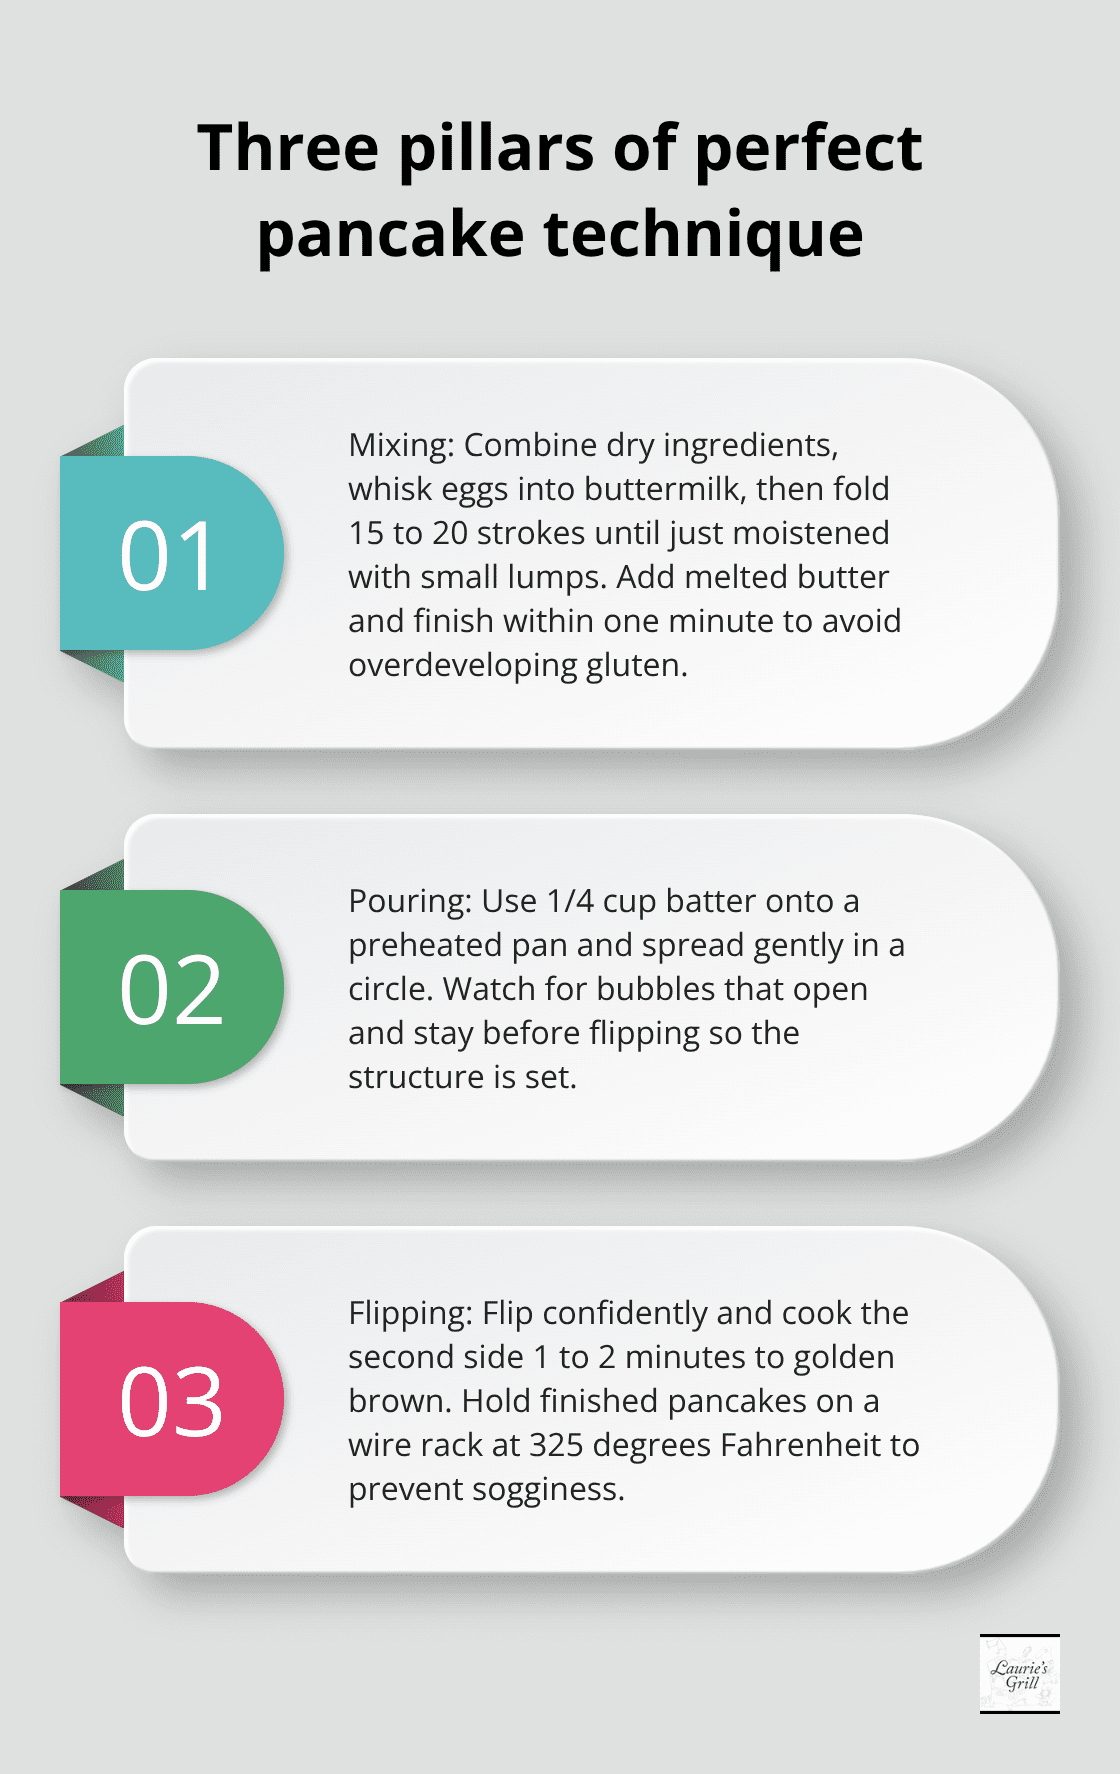
Start by combining your dry ingredients in a bowl, then whisk your eggs into the buttermilk separately. Fold the wet mixture into the dry ingredients with a spatula using about fifteen to twenty strokes. Stop as soon as flour disappears and small lumps remain visible. This takes discipline because your instinct will push you to keep stirring until the batter looks smooth, but smooth batter produces dense pancakes. Add your melted butter last and fold it in gently with another five to ten strokes. The entire mixing process should take less than one minute.
If you have time, let the batter rest for ten to fifteen minutes while you finish preheating your pan and griddle. This rest period allows the flour to fully hydrate and gives leavening agents time to activate without losing their gas bubbles to prolonged sitting.
Pouring and Watching for Readiness
Pour 1/4 cup of batter per pancake from the center of your preheated pan, then spread it gently in a circular motion using the back of your measuring cup. This creates uniform pancakes that cook evenly. Watch for bubbles to form on the surface and stay open, which signals that the bottom has set enough to flip. This typically takes two to three minutes depending on your heat level.
Never pour batter and walk away. Your attention during this window determines whether your pancakes rise properly or spread flat.
Flipping and Cooking the Second Side
Flip with a confident wrist motion using a thin plastic spatula, lifting the pancake about three inches and rotating your wrist for a clean landing. Cook the second side for one to two minutes until the bottom turns golden brown, then transfer to your wire rack inside a rimmed baking sheet preheated to 325 degrees Fahrenheit. This prevents condensation from making finished pancakes soggy while you cook remaining batches.
Temperature Testing and Adjustment
Your first batch always serves as a temperature test. If the pancakes spread flat and deflate after flipping, lower your heat and cook another test batch. If they brown too slowly, raise your heat slightly. Once you nail the temperature for your specific stove and pan, cook all remaining batches at that setting without adjusting.
Rotate your pan ninety degrees halfway through cooking each pancake to compensate for hot spots that most stoves create. This single adjustment prevents uneven browning and ensures consistent lift across every pancake.
Recognizing Doneness
Golden brown bottoms and centers that spring back when you press them gently indicate doneness. Pale pancakes need more heat or longer cooking time. Dark or charred edges signal heat that is too high or a pan that was not wiped clean between batches, allowing oil residue to burn.
Final Thoughts
Fluffy pancakes rest on three non-negotiable factors: fresh leaveners, minimal mixing, and steady heat. Master these fundamentals and you’ll produce pancakes that match or exceed what you get at your favorite diner. The science is straightforward, the equipment is affordable, and the technique takes practice but not years of training.
Customizing pancake recipes works best once you understand the baseline. Add toppings like tart preserves or fresh fruit to brighten the flavor and contrast the crisp edges. Bananas caramelize beautifully during cooking, while berries and chocolate chips are prone to burning (add them after the batter hits the pan rather than stirring them into the bowl). This prevents overmixing and keeps your pancakes light.
Homemade pancakes outperform frozen versions because you control every variable. Frozen pancakes sit in storage, losing moisture and leavening power, while your fresh batter uses active baking soda and baking powder that haven’t degraded. Start with the recipe provided in this guide, cook a test batch to dial in your stove’s heat, then visit Laurie’s Grill in Bend, Oregon to see how the professionals execute the classics with the same respect for fundamentals and quality ingredients.
Recent Comments